
How I Made a Bespoke Leather Toolbox from Scratch
- Peter Smith
- Feb 28, 2025
- 6 min read
Updated: Apr 11

I was recently asked to make a bespoke leather toolbox, which was to be given as a special birthday gift.
Over 2,000 stitches
45 hours to design and make
48 pieces of leather
108 tools and equipment
The brief was to make a bespoke leather toolbox for DIY tools. It was to be in brown with solid brass hardware.
I was not willing to make an ordinary "box". Oh no! I wanted to make something different, something special. So I asked the client to procure the tools they wanted in the toolbox, which I would use to design.
I was thinking about maximising space, not have the tools just piled in the bottom of the box and having the tools easy to get to but also having something that a person would enjoy using and love having.
This was to be a legacy article.
Designing the bespoke leather toolbox
The design was more than the client asked for.
I wanted to make something special, something practical and something that will last for decades.
The first step was to sketch out my design, thinking about shape, size practicality and yet still make something "special" and truly bespoke.
I considered several things when designing this.
What the client asked for. This is an important start. I wanted to meet the brief, but also wanted to add within those guidelines.
Size of the toolbox based on intended use.
The weight of the tools.
Maximising space. There is a lot of wall space I could use. I did not want to have a "pile of tools" just laying in the bottom of an ordinary box!
The sections needed. Did I want 1 section or 2? I opted for 2 in the end because I needed more "walls" to mount the tools.
Type of closure. In this case, I used straps with buckles as requested.
Carrying handle and shoulder strap.
Colour scheme. I chose to go with two contrasting colours for that special look.
How the tools would be laid out and mounted. This took some working out because I was working with small spaces.
I wanted both inside and outside to be the skin side of the leather, so that meant doubling up on most of the components.
As with any design work, there are many iterations of ideas
The first step was to figure out how I was going to arrange the tools, so that they were easily accessible, as well as secure.
So, I laid these tools out on my bench, knowing that I had 7 "walls" to mount things and knowing what sizes those walls are.
Planning the layout
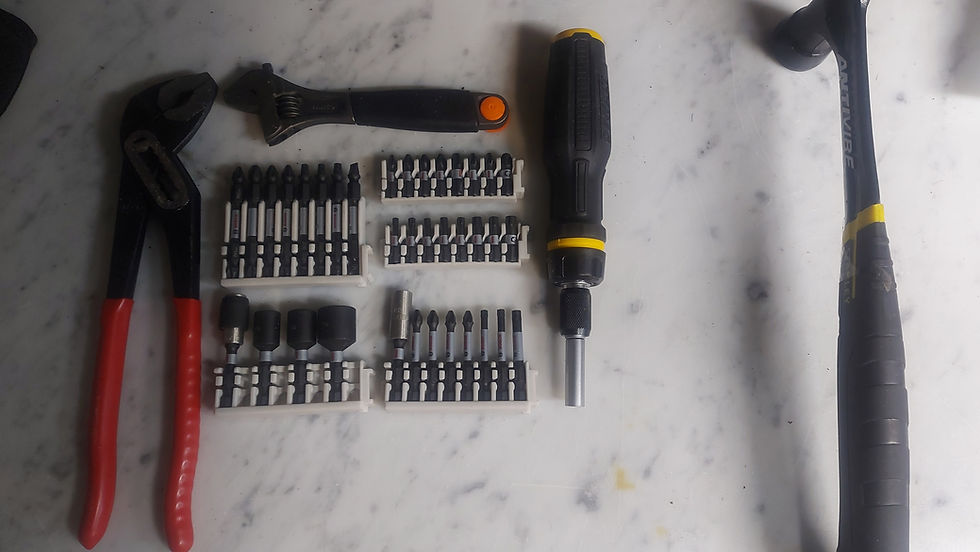
My first thought was to group tools. Measuring and marking in a group, screwdrivers in a group, and so on.
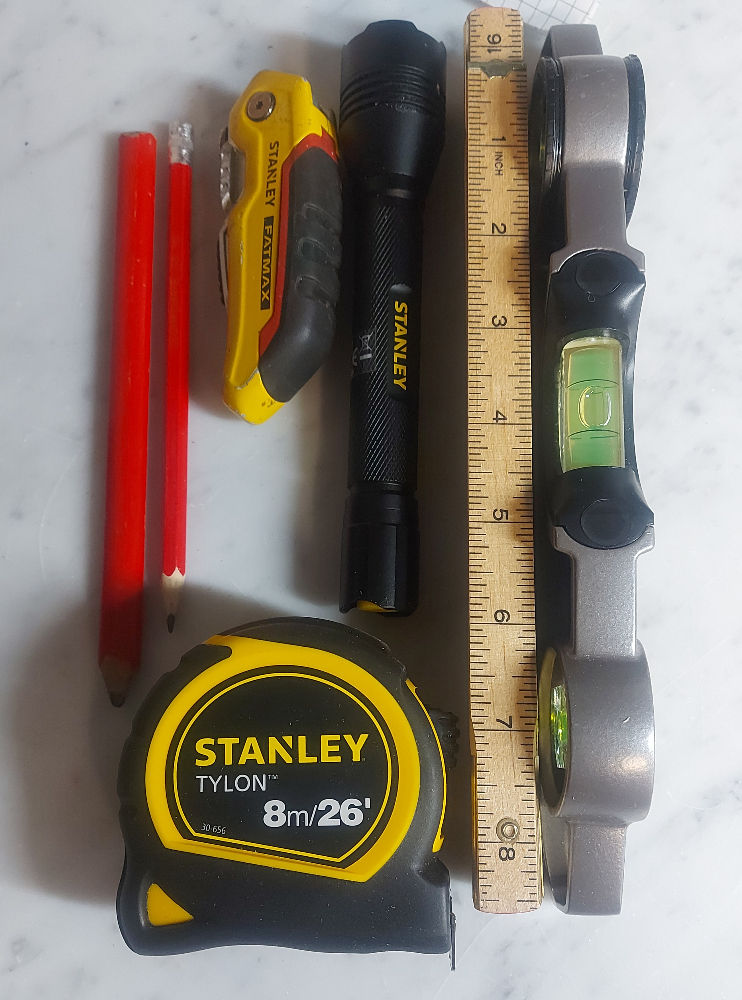
Here we have the measuring and marking tools together.
There is a ruler, tape measure, pencils and spirit level (with the torch and knife!)

Chisels and pliers together did not work in the end because they did not fit within the space I had.

What's the best way to store 3 different types screw drivers?
Dealing with the hammer was a challenge. How to secure it, within the space I had and still make it easy to get to.
After several hours of testing different arrangements, I had a plan! Now, I could draw the final design, which I sent to the client for approval, which of course they did.
Materials
High quality materials is the beginning of a high quality article.
European vegetable tanned leather. Only the best leather was used
Locally made leather oil dye. I choose oil dye because it does not dry the leather out like some dyes can.
I chose a woven (not twisted) nylon thread for longevity and strength.
I use a locally made finish for the final treatment and polishing of the leather.
Solid brass, cast buckles, keepers, D rings and hooks. The hooks I use are actually made for the horse world!
The making
The making process was very detailed and complex in parts.
Once the design was finalised, I transferred my measurements onto the leather.
There were around 48 pieces of leather to cut. As I was building, I made some changes and improvements to the design, so I ended up cutting about 60 pieces all told.

After cutting, the leather components were dyed, using two colours in this case.
Some of the components had to be finished before I started assembly because I would not be able to finish them once they were stitched in. So, I dealt the edging and finishing and polishing.
Stitching was done using a traditional saddle stitch, a technique that has been used for centuries in the horse world. There are over 2,000 stitches.
Because I was using two layers of leather for the box, I had to attach certain components before putting the two layers together, so as to hide the stitching or rivets on the inside, giving me a cleaner look.
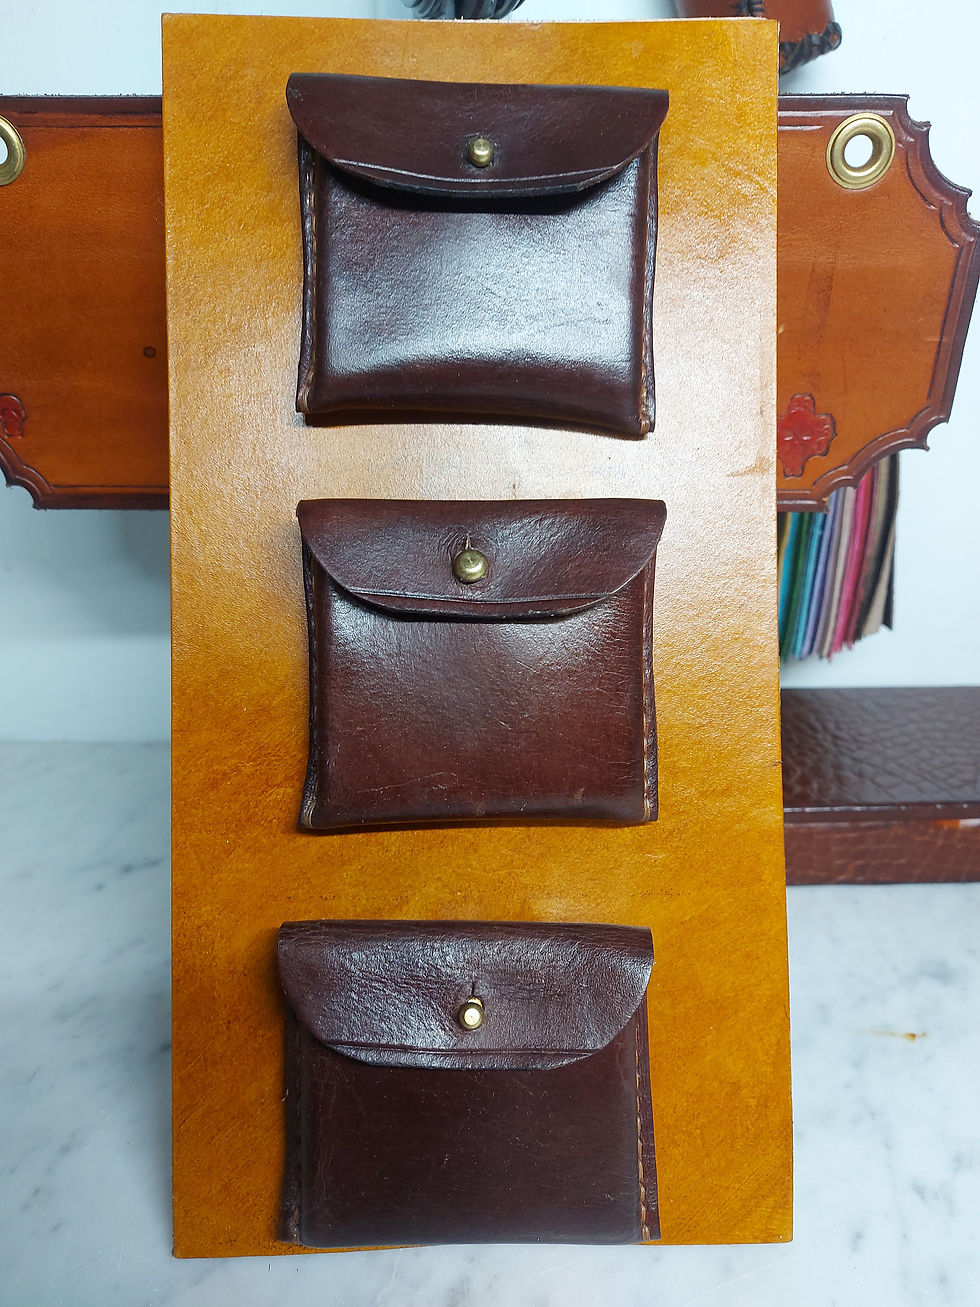
First, was making the components to mount and secure the tools, the little pouches (on the right), the straps and holders, etc.

Next was getting the parts mounted onto the panels (walls).

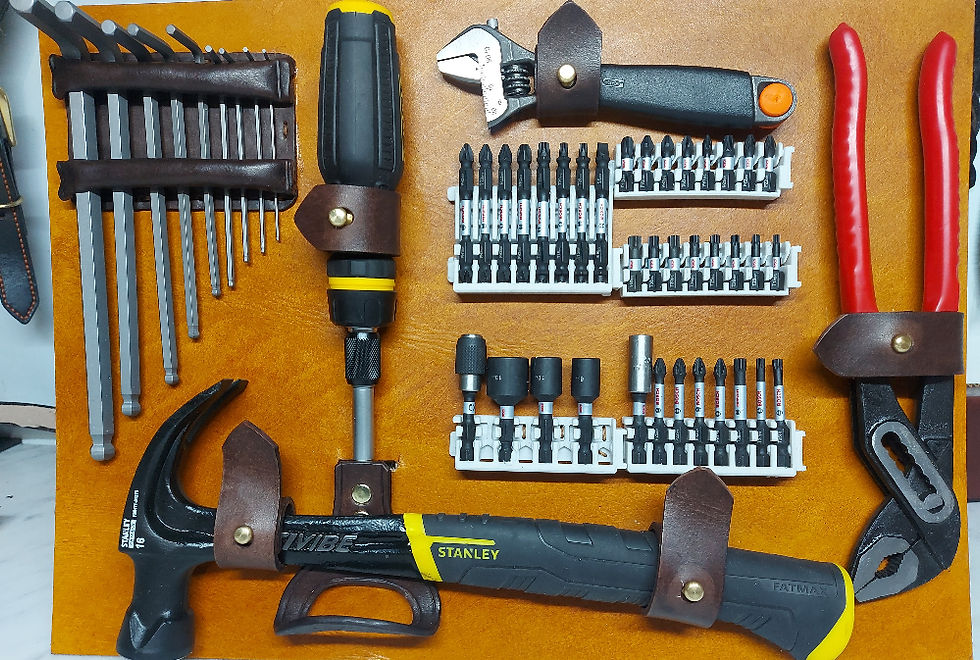
So, I ended up with these, which are the parts that would make up the walls.
I made these pouches, which were requested. What the client did not know is that I would make them so that they could also be clipped onto a belt. They also clip onto the wall of the box.
The various bits in the middle here were in a box. I found that the holders could be easily removed. That gave me some space back! I stitched the holders onto the wall of the box.
You can see piece behind the hammer. That is a belt hanger for the hammer. It clips onto the belt and the hammer is hung through the loop.
The client was not really bothered about this set of spanners being mounted. "Just let it lay on the bottom".
Well, I could not let that happen now could I?
This is all about maximising space.
The completed article
The longest part of the process of making something is in the preparation.
Now, I had the panels and it was time to start making the box.
This involved hours of hand stitching, using a traditional saddle stitch. Again, assembly had to be done in a particular order, including adding the hardware (buckles and keepers, D rings and clips.
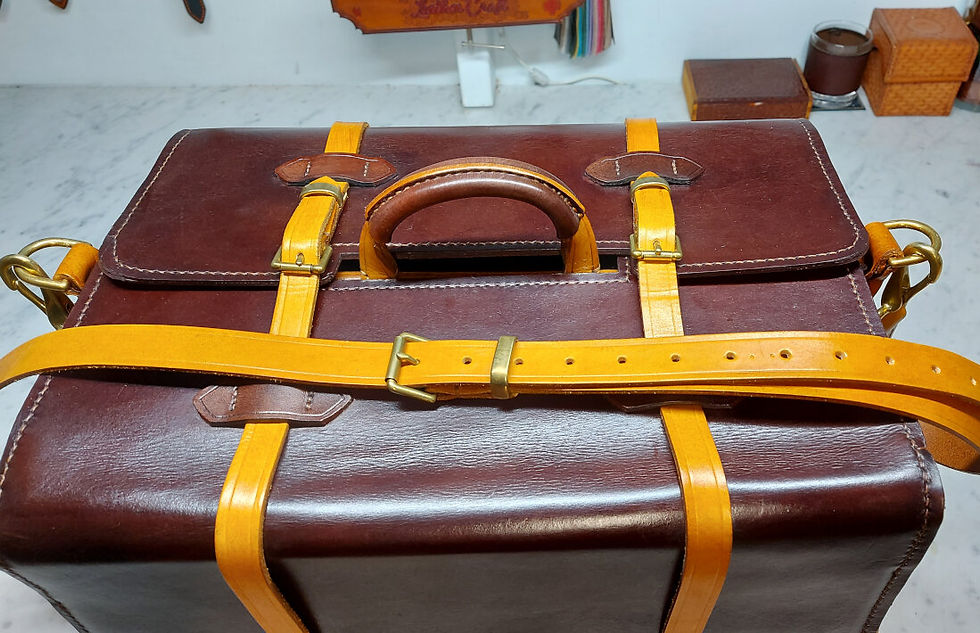
What I ended up with is this, what I think is a beautiful gift for a special birthday.

All done, a bespoke, hand crafted leather toolbox.

This toolbox, with the tools weighs 12.5 Kg, or 27.5 lb in old money!
You just might need the shoulder strap. But if you don't, the strap is removable.
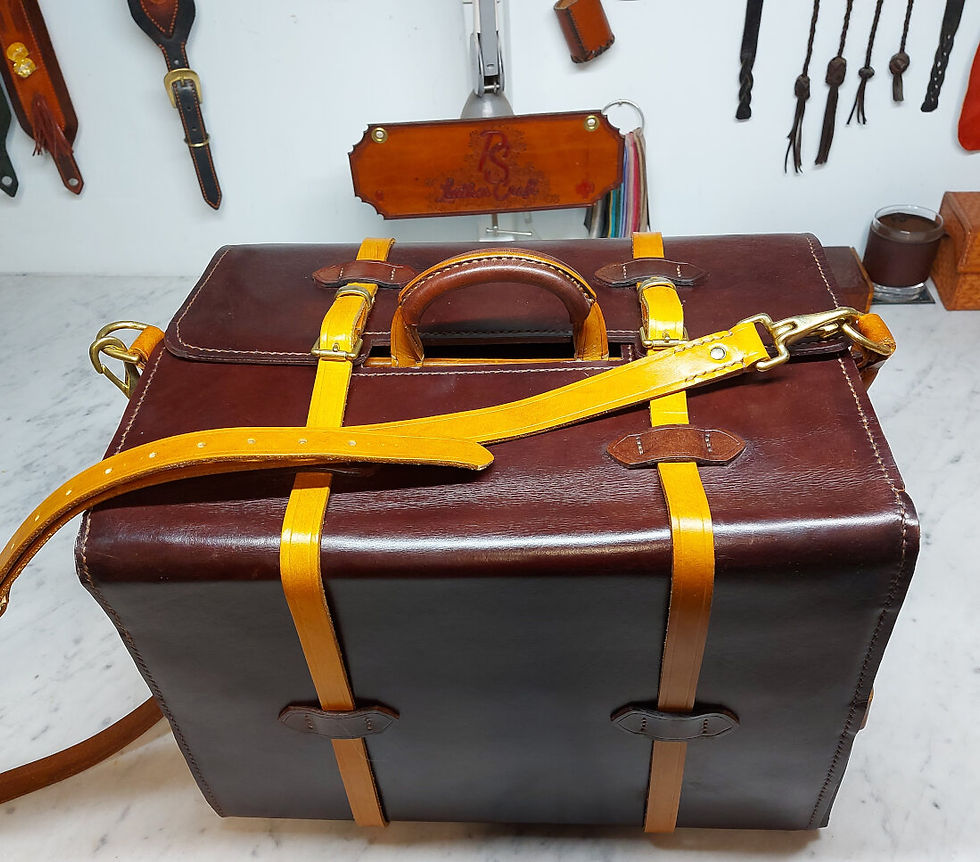

40 cm x 30 cm x 30 cm
16" x 12" x 12"
It's quite big.
All the main set of tools one might use for a DIY project are at the front.
The sides open out for easier access to the tools.

You can see how every item is "tied down" but easy to get to, proving that form can blend with functionality.

The chisels had to be mounted so that the sharp tips don't get damaged, or damage the leather and contents and to protect the user from injury. You don't want to be digging around a toolbox sharp object in it!

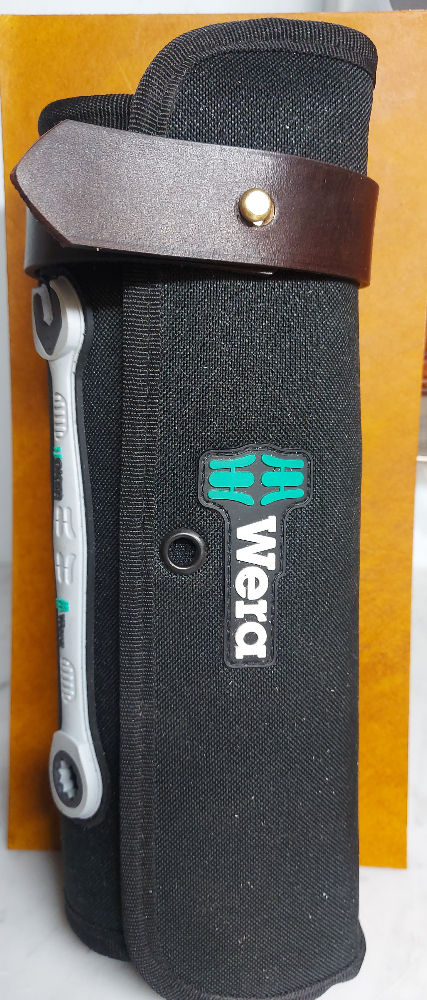
Opposite the chisels are the set of spanners, in their original tool roll.
I decided on contrasting colours during the design phase, and it has proven to be a good choice.
The tools
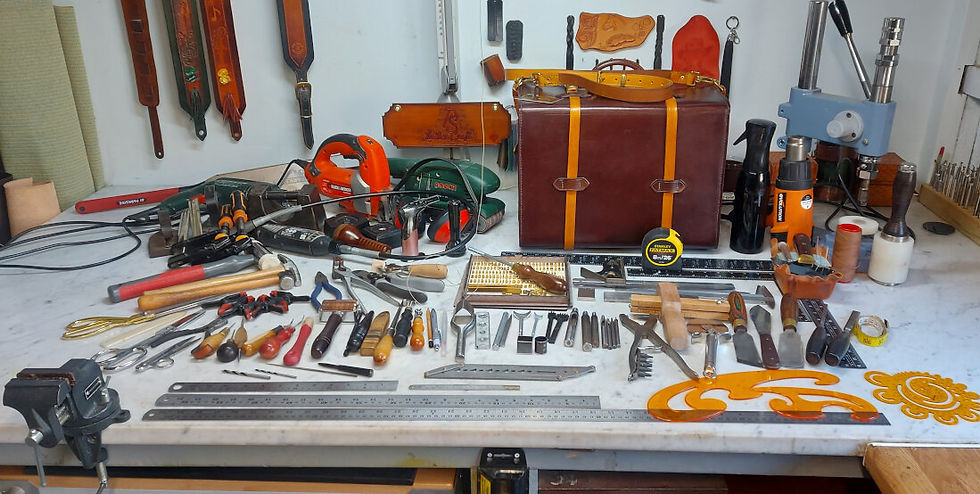
The right tools for the job
When working with leather, there are many, many processes to go through and as a result, a lot of tools are needed. Some of these tools were inherited, some were bought in antique shops, and some were bought new. It takes years to collect the tools you need for this work!
And the finishing products
The finishing is what brings the article to life.
I have my go-to products when it comes to finishing an article. This all depends on the type of leather, type of dye (oil based, water based or antique gel) and what finish I require.
I have spent many hours actually testing different products and methods and have come down to a few choices that I know will work and bring out the best from the leather.
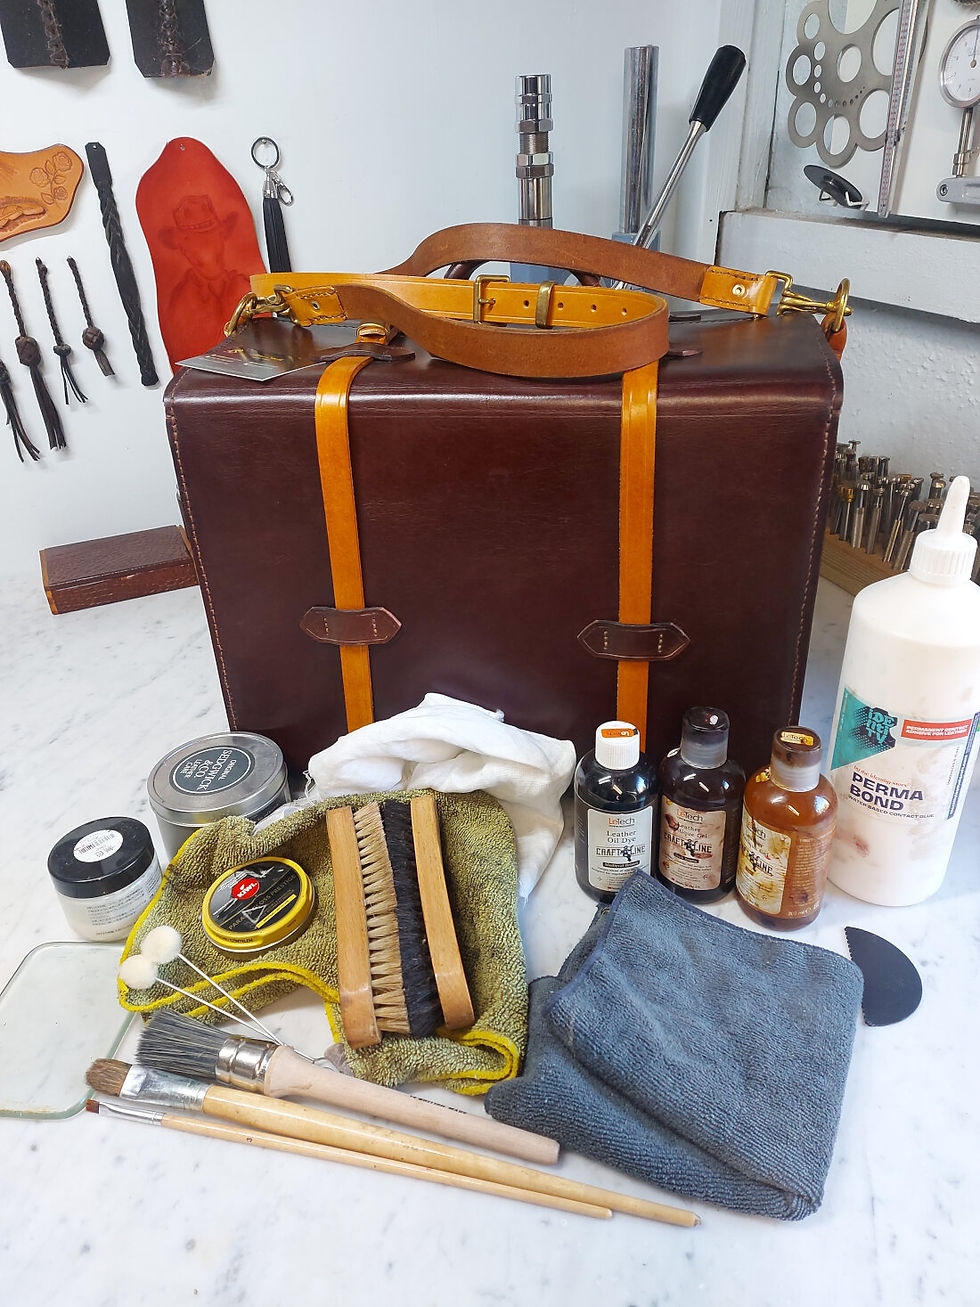
From my "lotions and potions cupboard"! Dyes, polishes, finishes, glue.
I don't use glue as a permanent fixing solution. I use glue to hold parts together whilst I am stitching.
Conclusion
My bespoke leather toolbox not only serves its purpose but also showcases my craftsmanship.
It’s a unique piece that reflects my personal style and skills.
It is a job I thoroughly enjoyed.


Comments